Job Management Guide
Learn how to effectively create, configure, and manage your JavaScript cron jobs in CronJS.
Overview
CronJS provides a comprehensive web-based interface for managing your cron jobs. This guide covers everything from basic job creation to advanced configuration options.
Job Creation Methods
UI-Based Job Creation (Current)
Currently, CronJS supports job creation through the web interface only:
Process Overview:
- Navigate to the dashboard
- Click “Create Job” button
- Configure job settings through the web form
- Save and activate your job
Note: API-based job creation will be available in future releases
Step-by-Step Job Creation
Step 1: Access Job Creation
From your dashboard at https://app.cronjs.com:
- Log in to your CronJS account
- Navigate to dashboard - You’ll see your existing jobs listed
- Click “Create Job” - This opens the job creation form
Step 2: Basic Job Information
Job Name
- Choose a descriptive, meaningful name
- Use clear naming conventions (e.g., “Daily Sales Report”, “API Health Check”)
- Good names help you identify jobs quickly in the dashboard
Starting Point Choose between:
- Blank Job - Start with empty code editor
- Template - Use pre-built job templates for common tasks
Step 3: Write Your JavaScript Code
The job creation interface includes a code editor with advanced features:
Editor Features
- JavaScript syntax highlighting - Code is color-coded for readability
- IntelliSense and autocomplete - Smart code suggestions as you type
- Error detection - Real-time syntax error highlighting
- Modern editing - Features like bracket matching, code folding
Example Job Code
// Simple logging job
console.log("Job started at:", new Date().toISOString());

// API monitoring example
const response = await fetch("https://api.example.com/health");
if (response.ok) {
  console.log("API is healthy");
} else {
  console.error("API health check failed:", response.status);
}

// Environment variable usage
const apiKey = process.env.API_KEY;
if (apiKey) {
  console.log("API key is configured");
} else {
  console.warn("API key not found");
}

console.log("Job completed successfully");
Step 4: Environment Variables
Securely store sensitive data and configuration:
Setting Environment Variables
- Navigate to “Environment Variables” section in the job creation form
- Add key-value pairs for your sensitive data
- Variables are encrypted and stored securely
- Cannot be viewed once saved (but can be overwritten)
Best Practices
// ✅ Good environment variable usage
const DATABASE_URL = process.env.DATABASE_URL;
const API_TOKEN = process.env.API_TOKEN;
const WEBHOOK_URL = process.env.WEBHOOK_URL;

// Validate required variables
if (!DATABASE_URL) {
  throw new Error("DATABASE_URL environment variable is required");
}

// Use descriptive variable names
const slackWebhookUrl = process.env.SLACK_WEBHOOK_URL;
const emailApiKey = process.env.EMAIL_API_KEY;
Common Environment Variables
// API credentials
const apiUrl = process.env.API_URL;
const apiKey = process.env.API_KEY;

// Database connections
const dbHost = process.env.DB_HOST;
const dbPassword = process.env.DB_PASSWORD;

// External service tokens
const slackToken = process.env.SLACK_TOKEN;
const githubToken = process.env.GITHUB_TOKEN;

// Configuration values
const environment = process.env.NODE_ENV || "production";
const logLevel = process.env.LOG_LEVEL || "info";
Step 5: Dependencies (Optional)
Add external npm packages your job needs:
Adding Dependencies
- Navigate to dependencies section in the job form
- Specify npm packages your code requires
- Packages are installed automatically before job execution
Example Dependencies
Common packages you might need:
axios- HTTP client for API callsnodemailer- Send emailsmoment- Date manipulationlodash- Utility functionscsv-parser- Parse CSV files
// Example using axios dependency
const axios = require("axios");

const response = await axios.get("https://api.example.com/data", {
  headers: {
    Authorization: `Bearer ${process.env.API_TOKEN}`,
  },
});

console.log("Data received:", response.data);
Step 6: Schedule Configuration
Set when your job should run using the visual cron builder:
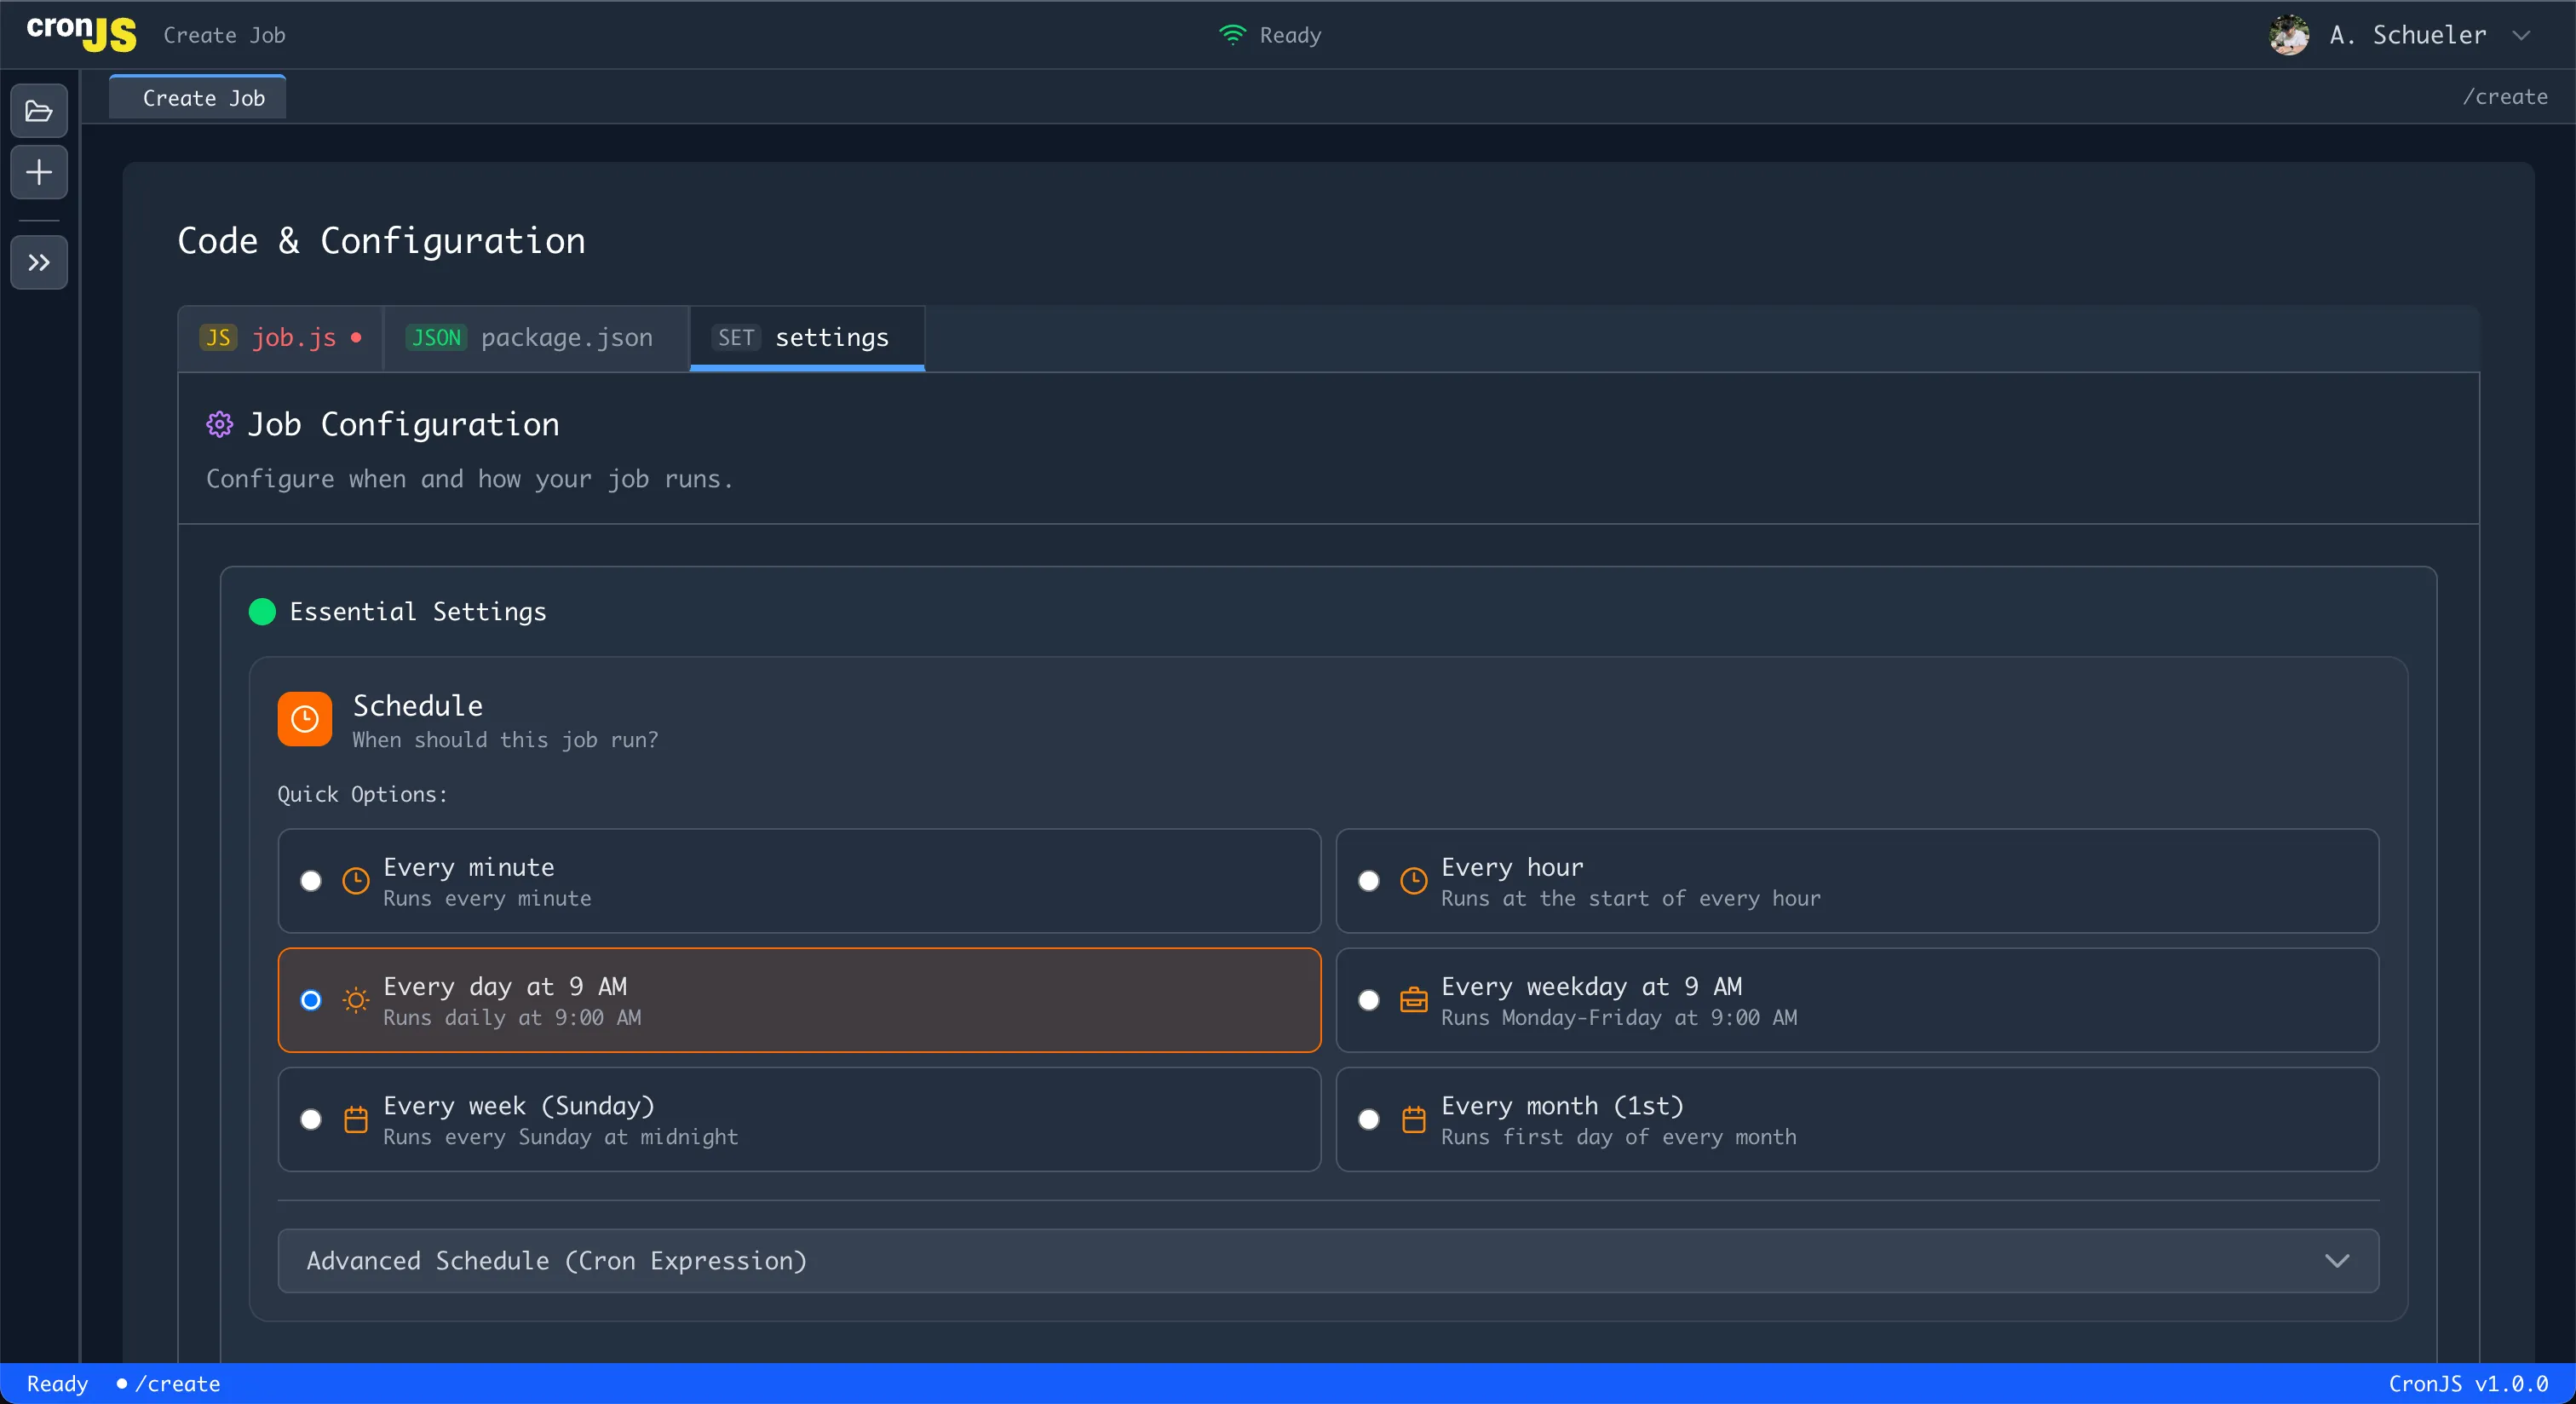
Three Scheduling Options
1. Preset Patterns Choose from common scheduling patterns:
- Every 5 minutes:
*/5 * * * * - Daily at 9 AM:
0 9 * * * - Weekly on Monday:
0 9 * * 1 - Monthly on 1st:
0 9 1 * *
2. Visual Builder Interactive interface to build custom schedules:
- Select minute intervals
- Choose hour ranges
- Pick specific days
- Set monthly patterns
3. Manual Expression Write cron expressions directly:
- Real-time validation
- Human-readable preview
- Syntax error detection
Common Scheduling Examples
# Every 15 minutes
*/15 * * * *

# Daily at 2:30 AM
30 2 * * *

# Every weekday at 9 AM
0 9 * * 1-5

# First day of every month
0 0 1 * *

# Every Sunday at midnight
0 0 * * 0
Step 7: Resource Configuration
Configure CPU, memory, and timeout limits:
Default Resource Limits
Free Tier Defaults:
- CPU: 250,000,000 NanoCPUs (0.25 CPU cores)
- Memory: 134,217,728 bytes (128 MB)
- Timeout: 60 seconds
Upgrading Resource Limits
- Higher limits available with paid plans
- Configurable resources for demanding jobs
- Custom timeout settings for long-running tasks
// Monitor resource usage in your jobs
const startTime = Date.now();
const startMemory = process.memoryUsage();

// Your job logic here
await performTask();

const endTime = Date.now();
const endMemory = process.memoryUsage();

console.log(`Execution time: ${endTime - startTime}ms`);
console.log(
  `Memory used: ${(endMemory.heapUsed - startMemory.heapUsed) / 1024 / 1024}MB`
);
Step 8: Review and Create
- Review your job configuration in the summary section
- Verify all settings are correct
- Click “Create Job” to save
- Job is now active and will run according to schedule
Managing Existing Jobs
Job Operations
Enable/Disable Jobs
To disable a job:
- Go to the job details page
- Click “Edit” to enter edit mode
- Toggle the “Enabled” radio button to “Disabled”
- Save changes
To re-enable a job:
- Follow the same steps
- Toggle “Enabled” radio button to “Enabled”
- Save changes
Manual Job Execution
To run a job immediately:
- Navigate to the job details page
- Click the “Run Now” button
- Job executes immediately regardless of schedule
- View real-time execution status
- Check logs in execution history
Job Limitations in MVP
Current limitations:
- No job stopping - Jobs run until completion or timeout
- No bulk operations - Jobs must be managed individually
- UI-only management - No programmatic API access yet
Viewing Job Status
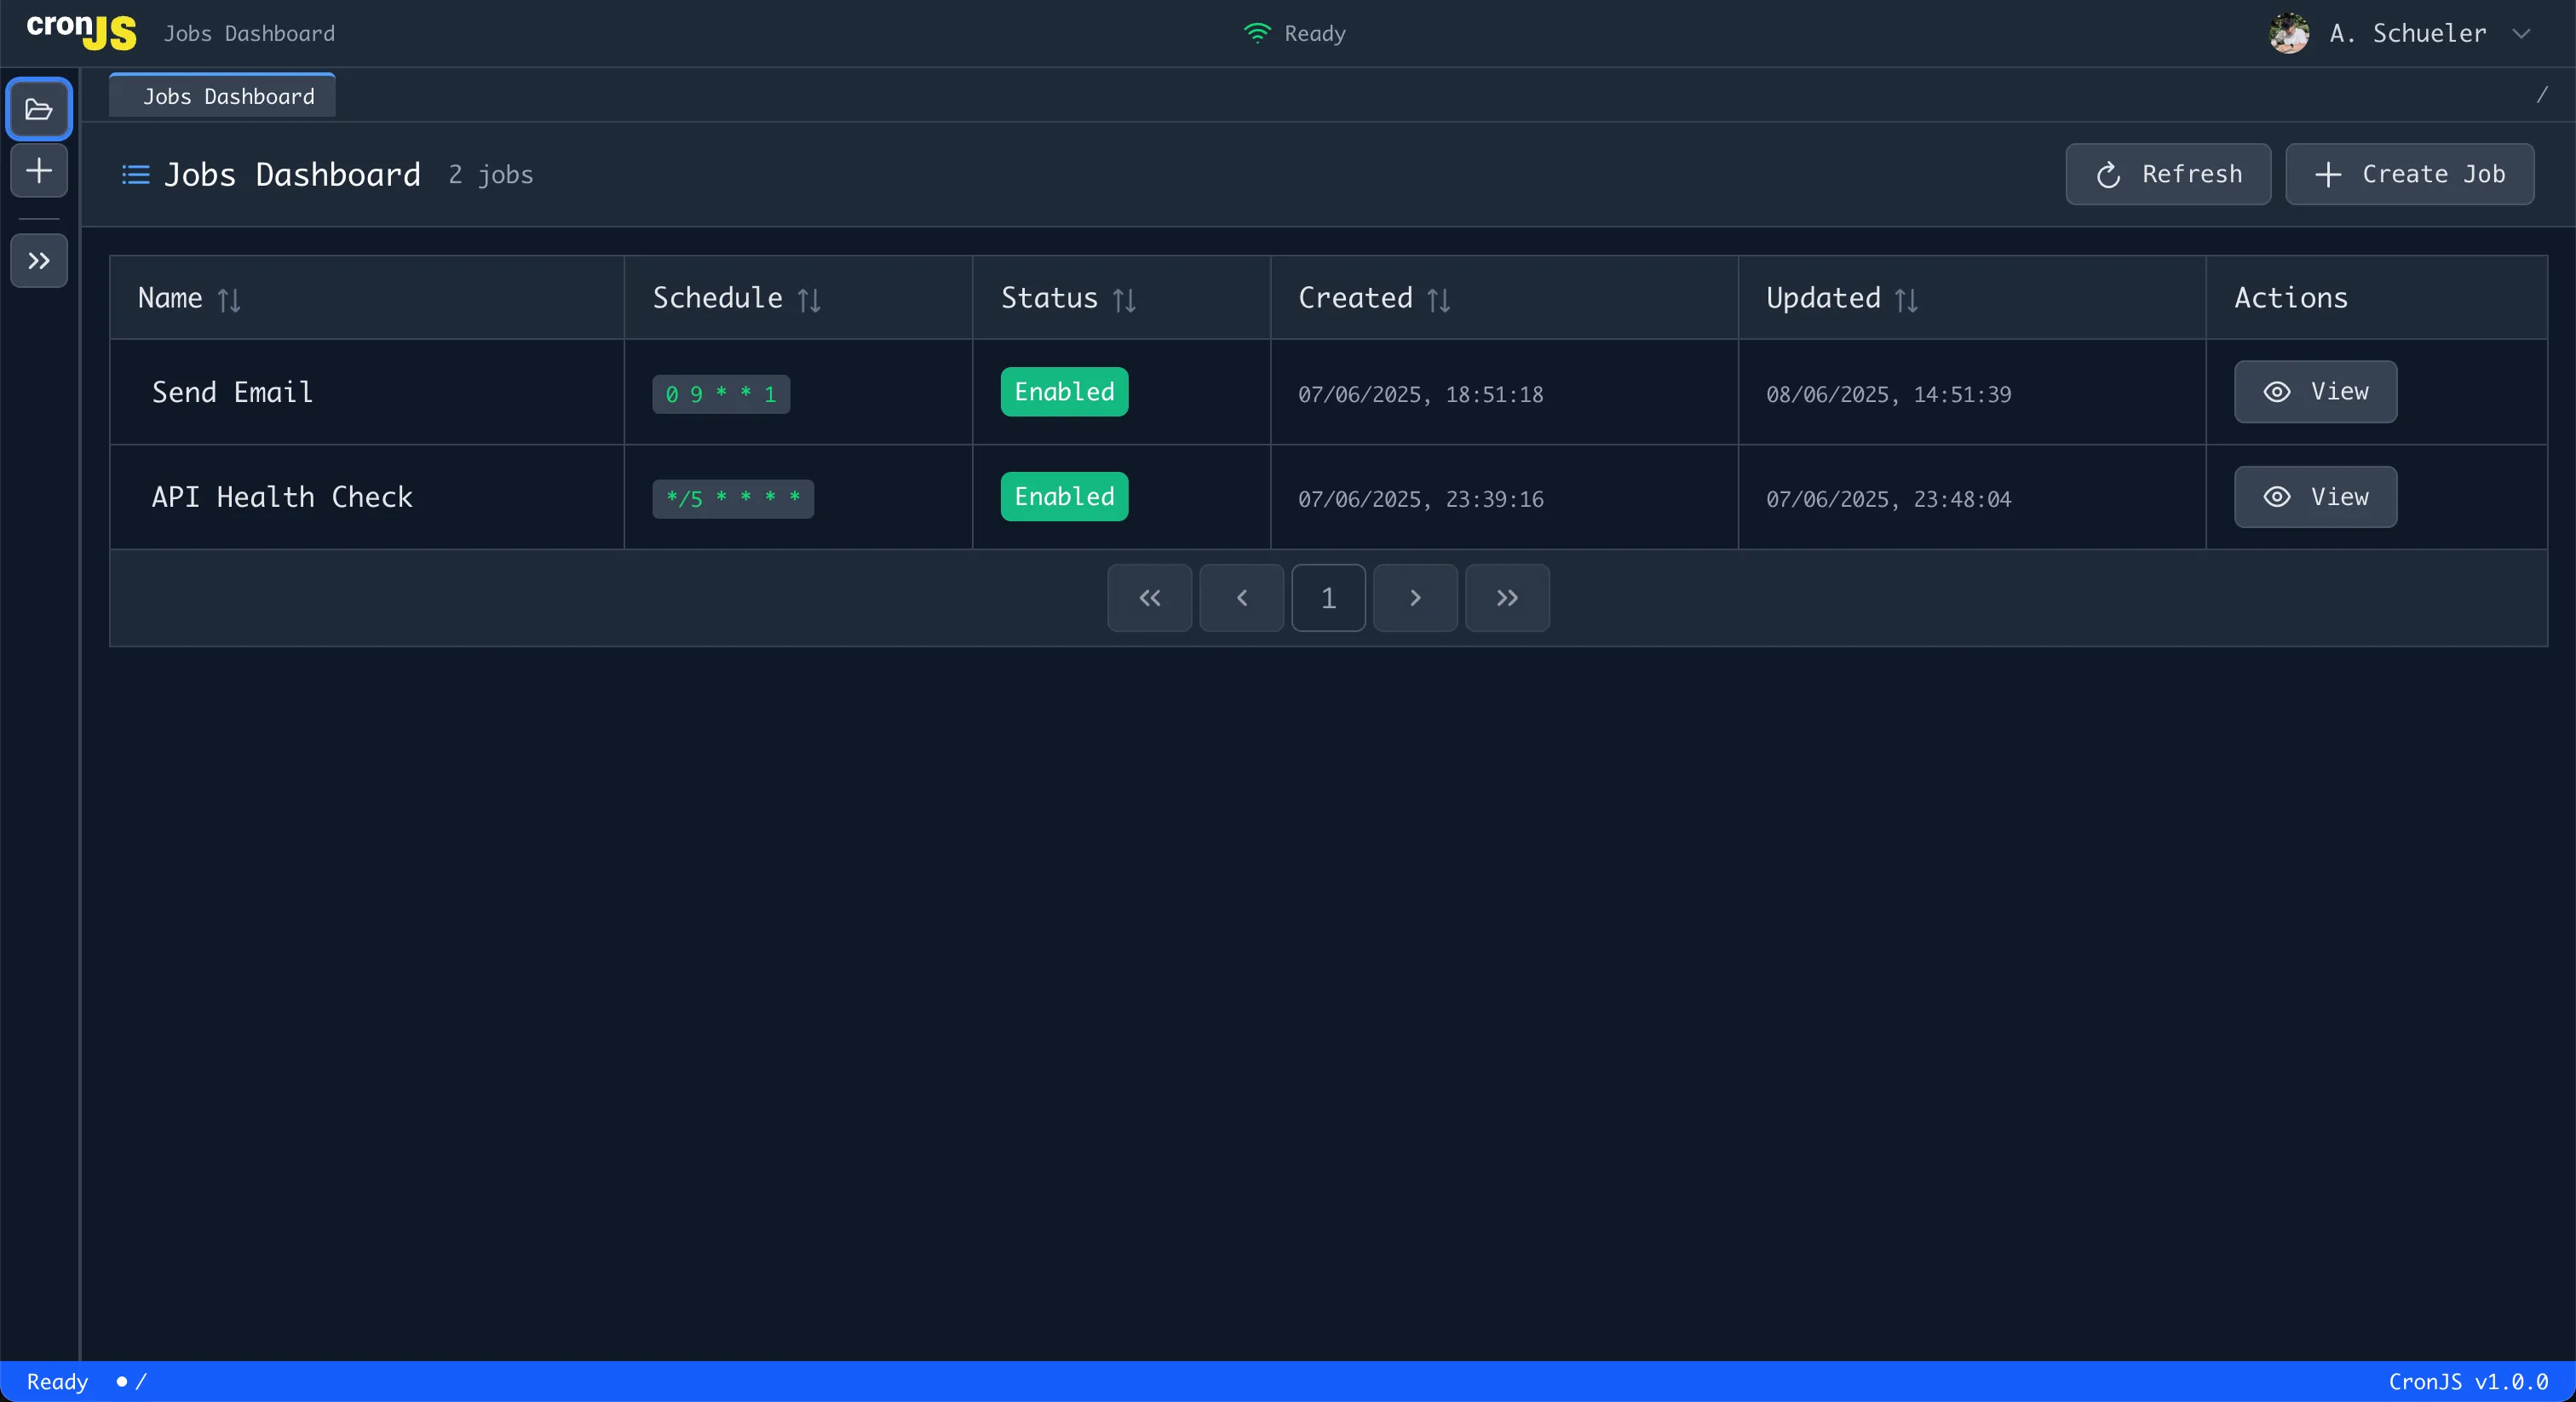
Dashboard Overview
From the main dashboard:
- Job count - Total number of jobs
- Status indicators - Visual status for each job
- Quick actions - Run, edit, or view jobs
- Refresh button - Update job list
Job Details Page
Individual job pages show:
- Job configuration - Code, schedule, environment variables
- Execution history - Recent runs with timestamps
- Status information - Enabled/disabled state
- Performance metrics - Execution times and resource usage
Execution History and Logs
What’s Captured
Each job execution records:
- Start time - When execution began
- End time - When execution completed
- Exit code - 0 for success, non-zero for errors
- Console output - All stdout logs from your job
- Error messages - stderr output and exception details
- Execution duration - Total runtime
Accessing Logs
- Navigate to job details page
- Scroll to execution history section
- Click on specific execution to view detailed logs
- Download logs if needed for external analysis
Log Retention
- Storage location - MongoDB database
- Retention policy - Currently not explicitly configured
- Access control - Only job owner can view logs
Best Practices
Job Naming Conventions
// ✅ Good naming examples
"Daily Sales Report";
"API Health Check 5min";
"Weekly Database Cleanup";
"Monthly Invoice Generation";

// ❌ Avoid unclear names
"Job1";
"Test";
"MyJob";
"Untitled";
Code Organization
// ✅ Well-structured job code
async function main() {
  try {
    console.log("Starting daily report generation...");

    // Validate environment
    validateEnvironment();

    // Fetch data
    const data = await fetchDailyData();

    // Process data
    const report = await generateReport(data);

    // Send report
    await sendReport(report);

    console.log("Daily report completed successfully");
  } catch (error) {
    console.error("Daily report failed:", error.message);
    throw error; // Re-throw to mark job as failed
  }
}

function validateEnvironment() {
  const required = ["API_URL", "EMAIL_TOKEN"];
  for (const env of required) {
    if (!process.env[env]) {
      throw new Error(`${env} environment variable is required`);
    }
  }
}

// Execute main function
main();
Error Handling
// ✅ Robust error handling
async function robustTask() {
  const maxRetries = 3;

  for (let attempt = 1; attempt <= maxRetries; attempt++) {
    try {
      return await performTask();
    } catch (error) {
      console.error(`Attempt ${attempt} failed:`, error.message);

      if (attempt === maxRetries) {
        throw new Error(`Task failed after ${maxRetries} attempts`);
      }

      // Wait before retry
      await new Promise((resolve) => setTimeout(resolve, 1000 * attempt));
    }
  }
}
Security Best Practices
// ✅ Secure practices
// Never log sensitive data
console.log("API token configured:", !!process.env.API_TOKEN);

// Validate inputs
function validateInput(data) {
  if (typeof data !== "object" || !data) {
    throw new Error("Invalid input data");
  }
}

// Use environment variables for credentials
const apiKey = process.env.API_KEY;
if (!apiKey) {
  throw new Error("API_KEY not configured");
}
Troubleshooting Common Issues
Job Creation Problems
Issue: Job won’t save
- Check for syntax errors in your JavaScript code
- Ensure required fields are filled
- Verify cron expression is valid
Issue: Dependencies not working
- Check package names are spelled correctly
- Ensure packages exist on npm
- Use specific version numbers if needed
Execution Issues
Issue: Job times out
- Check if job completes within 60-second limit
- Optimize code for better performance
- Consider upgrading to higher timeout limits
Issue: Environment variables not accessible
- Verify variables are set in job configuration
- Check variable names match exactly (case-sensitive)
- Ensure no typos in variable names
Performance Issues
Issue: Job runs too slowly
- Profile your code to identify bottlenecks
- Optimize database queries
- Consider breaking large tasks into smaller jobs
Issue: Memory errors
- Monitor memory usage in your code
- Process data in smaller chunks
- Consider upgrading memory limits
Future Enhancements
Planned features for upcoming releases:
API Access
- Programmatic job management - Create and manage jobs via API
- Webhook integrations - Trigger jobs from external events
- CLI tools - Command-line job management
Advanced Features
- Job dependencies - Chain jobs together
- Bulk operations - Manage multiple jobs simultaneously
- Job templates - Share common job patterns
- Advanced scheduling - More complex timing options
Enterprise Features
- Team collaboration - Share jobs with team members
- Role-based access - Control who can edit jobs
- Advanced monitoring - Detailed performance metrics
- Custom environments - Specialized runtime configurations
Next Steps
- Advanced Scheduling - Master complex cron patterns
- Monitoring & Logging - Track job performance
- Troubleshooting - Solve common job issues
- Security Best Practices - Secure your jobs
Start building powerful automation with CronJS job management! 🚀